Terrariums bring the outdoors inside
BY KENNETH SETZER
As published in the Miami Herald, 9/18/14.
Oh terrarium, how I love thee! Why? Because terrariums might be the perfect way to garden — you can make them indoors sans mosquitoes and heat, maintain the entire area in just minutes and create your own perfect little garden utopia in a jar. They are under control and contained, but are just unpredictable enough by means of new growth to hold your interest.
Here are some tips on how to create your own little world.
There are two types of terrariums: an open terrarium, which exists in a container that remains open at the top, and a closed terrarium, which is essentially like a bottle with its cap on. The open types are better for desert terrariums containing cacti and succulents needing drier conditions.
It’s useful to think of terrariums as miniature greenhouses, especially the closed type.
Choose a clear glass container, though clear plastic is acceptable. Unless you are adept at making ships-in-bottles, use a container with a wide enough opening for you to finesse your plants into place, but small enough to keep out curious cats. Wash and dry it thoroughly before planting.
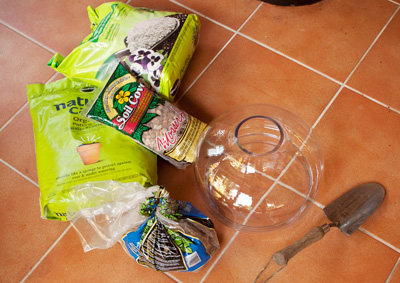
Lay out your terrarium supplies before you involve plants. Kenneth Setzer/FTBG.
A terrarium should provide all the elements a plant requires — light, water, humidity levels, etc. But be aware that inside a container, all these conditions are amplified. Placing a glass container in direct sunlight will fry your plants. Likewise, overwatering will quickly cause root rot and mildew. It’s all about balance.
In addition to the container, gather these supplies:
▪ Quality potting soil that drains well. Don’t skimp here, because the cheap stuff often clumps and becomes quite dense. Do not use compost. As much as plants and I love compost, it is full of bugs. You don’t want these indoors.
▪ Perlite to mix into your soil to promote good drainage and aeration.
▪ Horticultural charcoal to inhibit mold and filter water. This might be tough to find, but it’s pretty much the same charcoal used in aquarium filters (aka activated filter carbon).
▪ Small pebbles, which you should buy, not collect, since you may introduce pathogens to your terrarium if you bring in pebbles from the “wild.” For larger ornamental rocks, wash them with dishwashing detergent and let dry thoroughly.
▪ Sphagnum moss, for reasons we’ll see.
▪ And plants, of course.
Choosing plants is perhaps the hardest part. Because you need to meet the environmental needs of a group of plants in a small area, they need to be similar in their requirements. None should grow too quickly or get too large when mature.
For a large terrarium, I wanted more or less a damp undergrowth woodland theme, with nothing too formal. I picked plants that would work, were easily acquired and cheap. I had no problem mixing plants that in nature wouldn’t be caught dead next to each other, except for their shared need for a similar habitat.
My first purchase was a Selaginella species. Selaginella is a somewhat primitive spore-producing plant with a fascinating lineage — particularly during the Carboniferous period — often called spike moss, but it isn’t a moss at all. It looks and behaves somewhat like a fern, but also isn’t a fern. My plant had no species indicated, but it’s possibly meadow spike moss (Selaginella apoda), a chartreuse-green creeping ground hugger.
Moss makes for a good terrarium all on its own, looking to me like a near-microscopic woodland unto itself. I once picked up a moss-covered rock and simply placed it on soil inside a closed jar. Over the years, it sprouted multiple ferns, the spores of which were apparently hiding in the porous rock.
This time I decided to splurge on a package of terrarium moss, which includes three or four species. This way, I’m not taking from a natural area, and the moss will (I hope) be less likely to harbor critters.
Recently, scientists revived moss believed to be 1,500 years old, so the brownish prepackaged moss you might find available isn’t dead, just dormant. A couple caveats however: Moss may appear to be a denizen of damp, shady areas, but it actually needs a fair amount of light and fresh air to thrive. Also, it needs to make good contact with your soil. Push it firmly into the potting soil; you won’t hurt it.
Next is an unidentified fern I found growing in a small pot outdoors. It will add some height variation to the landscape. Finally, I couldn’t help but include Fittonia, another groundcover.
Layer your terrarium in a way that best promotes drainage. Unlike a flowerpot, your terrarium won’t have drain holes in the bottom, and you don’t want your plants’ roots sitting in water. Layer the very bottom with pebbles. Then add the charcoal loosely on top of the pebble layer. At this point some people place a nylon mesh screen over the mixture to keep soil from mixing with the pebble/charcoal layer. I use sphagnum moss instead. Just a small amount, shredded and spread over the pebbles, will hold soil back while maintaining humidity.
Now, the heart of your terrarium: the soil. It needs to be deep enough to accommodate your plants’ roots, which you should trim if they are scraggly or brown. The entire substrate should be about a quarter to a third of your container height. Tamp the soil firmly.
This is one of the larger terrariums I’ve made, so I took the opportunity to include some interesting topography in the form of a central valley flanked by hills. After forming the soil this way I arranged the plants outside the container to get an idea of how I wanted to place things. This is pretty much up to you, but if your container has a back, place taller plants towards it. Avoiding symmetry and planting in groups of three is also pleasing. I couldn’t resist including a ceramic house meant for bonsai arrangements — maybe I’ll retire there.
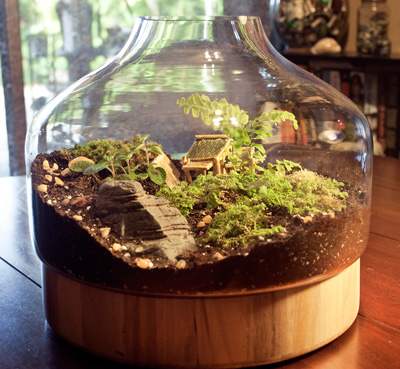
The finished arrangement, a contained world safe from wayward cats. Kenneth Setzer/FTBG.
Create small holes with a finger, add plants and tamp soil around them. If you don’t like the way they look, move the plants around.
Strategically placed pebbles or larger rocks can serve to draw the viewer’s gaze along trails or towards other features. They also help anchor soil in place.
Use an atomizer to mist your new landscape. Keep an eye out for mildew and fungus; they can quickly overtake and kill your plants. If you see fuzzy white growth, immediately remove it and let things dry out a bit. Trim any foliage that presses up against the glass.
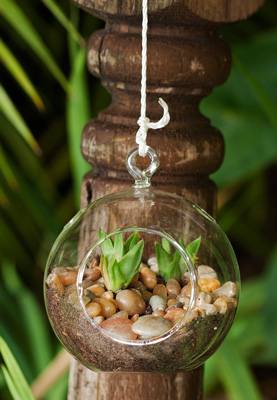
A dry terrarium featuring Kalanchoe succulents. Kenneth Setzer/FTBG.
Whether you choose a formal Victorian-style Wardian case terrarium full of rare African violets or an old pickle jar harboring a single plant, have fun contemplating the tiny world you’ve created.